
Learning Kubernetes and doing all sorts of component setups but not having fun with silly examples. Then you are at the right place. In this topic, we will set up something that is more realistic, more enthusiastic, and more satisfactory for a Kubernetes beginner. Instead of running some CLI application or some HelloWorld web application from a terminal, we will build a static HTML CSS website using any free templates available online of your choice.
Of course, I will build a static template of my choice, but you can try your own template by following the tutorial. Just download your template from any of the free HTML CSS template sites and extract it. Then identify the files that are required for running the template as a static website. We will not include unnecessary files because doing that will increase the size of our docker image. Yes, you got it right, we will bundle our static template files as a docker image.
Steps involved in the process:
- Download a free HTML CSS template of your choice
- Try the template with Docker first before jumping to Kubernetes, because we will get lots of things copied from here to Kubernetes. (the Docker image & the Nginx configuration)
- Starting a local Kubernetes cluster (We will use Kind here to create a multi-node cluster)
- Setup Nginx Ingress service
- Build the docker image for the Kubernetes environment
- Import the newly build docker image into the Kubernetes cluster
- Create the Kubernetes Deployment component
- Create the Kubernetes Service component
- Do the DNS bypass and testing
- Create the Kubernetes Ingress component
- Clear everything to keep your system clean
Start a multi-node ingress-ready Kubernetes cluster using Kind.
Why a multi-node cluster? Because we are learning Kubernetes and its eco-system/features. As we know Kubernetes helps us expand our application horizontally to multiple servers for the sake of high availability and zero downtime, we will try the same with a multi-node cluster. We will replicate our application on different nodes available on the cluster.
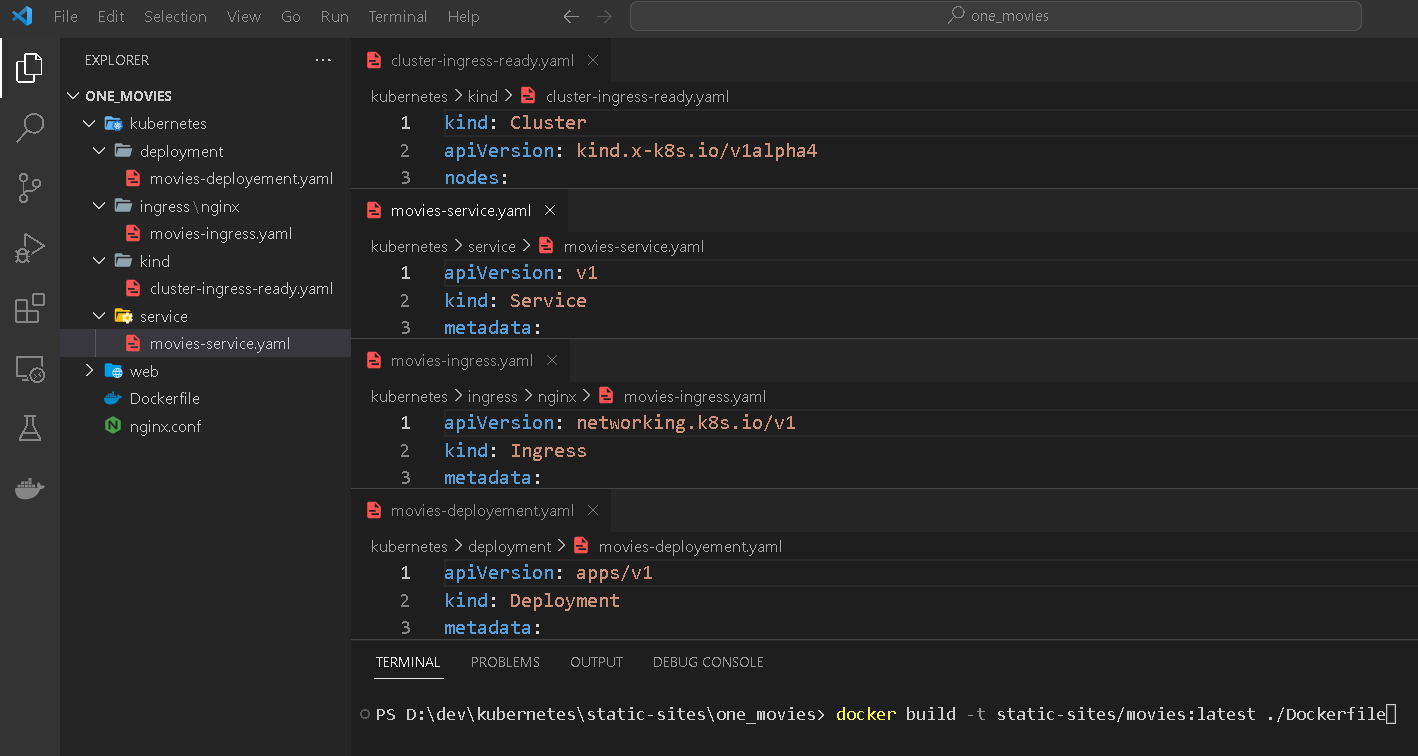
We will create a more configured cluster than a simple one, so we will write the cluster configuration into a YAML file like the below one. Read this article “How to set up a Kubernetes cluster locally using Kind” if you are a beginner in Kubernetes with Kind.
kind: Cluster
apiVersion: kind.x-k8s.io/v1alpha4
nodes:
  - role: control-plane
    kubeadmConfigPatches:
      - |
        kind: InitConfiguration
        nodeRegistration:
          kubeletExtraArgs:
            node-labels: "ingress-ready=true"
    extraPortMappings:
      - containerPort: 80
        hostPort: 80
        protocol: TCP
      - containerPort: 443
        hostPort: 443
        protocol: TCP
  - role: worker
  - role: worker
We will apply this cluster configuration using the following CLI command. This configuration will generate a Kubernetes cluster having one master/control-plane node and two worker nodes. We have also instructed about Ingress configuration in the file and port mappings from the host machine to the node to be used as the server.
kind create cluster --config .\kubernetes\kind\cluster-ingress-ready.yamlYou should get output something like the below. I am using Docker Desktop for Windows.
Creating cluster "kind" ...
 • Ensuring node image (kindest/node:v1.25.3) 🖼  ...
 ✓ Ensuring node image (kindest/node:v1.25.3) 🖼
 • Preparing nodes 📦 📦 📦   ...
 ✓ Preparing nodes 📦 📦 📦
 • Writing configuration 📜  ...
 ✓ Writing configuration 📜
 • Starting control-plane 🕹️  ...
 ✓ Starting control-plane 🕹️
 • Installing CNI 🔌  ...
 ✓ Installing CNI 🔌
 • Installing StorageClass 💾  ...
 ✓ Installing StorageClass 💾
 • Joining worker nodes 🚜  ...
 ✓ Joining worker nodes 🚜
Set kubectl context to "kind-kind"
You can now use your cluster with:

kubectl cluster-info --context kind-kind

Thanks for using kind! 😊
Next, initiate the ingress controller service.
Nginx ingress controller deployment on Kind cluster
To know more about what is Ingress please follow https://github.com/kubernetes/ingress-nginx.
kubectl apply -f https://raw.githubusercontent.com/kubernetes/ingress-nginx/main/deploy/static/provider/kind/deploy.yamlYou should get output something like the below.
namespace/ingress-nginx created
serviceaccount/ingress-nginx created
serviceaccount/ingress-nginx-admission created
role.rbac.authorization.k8s.io/ingress-nginx created
role.rbac.authorization.k8s.io/ingress-nginx-admission created
clusterrole.rbac.authorization.k8s.io/ingress-nginx created
clusterrole.rbac.authorization.k8s.io/ingress-nginx-admission created
rolebinding.rbac.authorization.k8s.io/ingress-nginx created
rolebinding.rbac.authorization.k8s.io/ingress-nginx-admission created
clusterrolebinding.rbac.authorization.k8s.io/ingress-nginx created
clusterrolebinding.rbac.authorization.k8s.io/ingress-nginx-admission created
configmap/ingress-nginx-controller created
service/ingress-nginx-controller created
service/ingress-nginx-controller-admission created
deployment.apps/ingress-nginx-controller created
job.batch/ingress-nginx-admission-create created
job.batch/ingress-nginx-admission-patch created
ingressclass.networking.k8s.io/nginx created
validatingwebhookconfiguration.admissionregistration.k8s.io/ingress-nginx-admission created
Wait for the ingress controller setup to complete.
kubectl wait --namespace ingress-nginx --for=condition=ready pod --selector=app.kubernetes.io/component=controller --timeout=90sYou should get output something like the below.
pod/ingress-nginx-controller-6bccc5966-7rjtd condition metPreparing Docker Image for Kubernetes
Next, load the desired docker image(s) on the Kubernetes cluster. You should prepare a docker image of the static site beforehand. We will use what we have tried in step #2 Try the template with Docker first before jumping to Kubernetes. We will build the docker image for sharing (we will share the image from our host machine to the Kubernetes cluster).
docker build -t static-sites/movies:latest ./Dockerfile
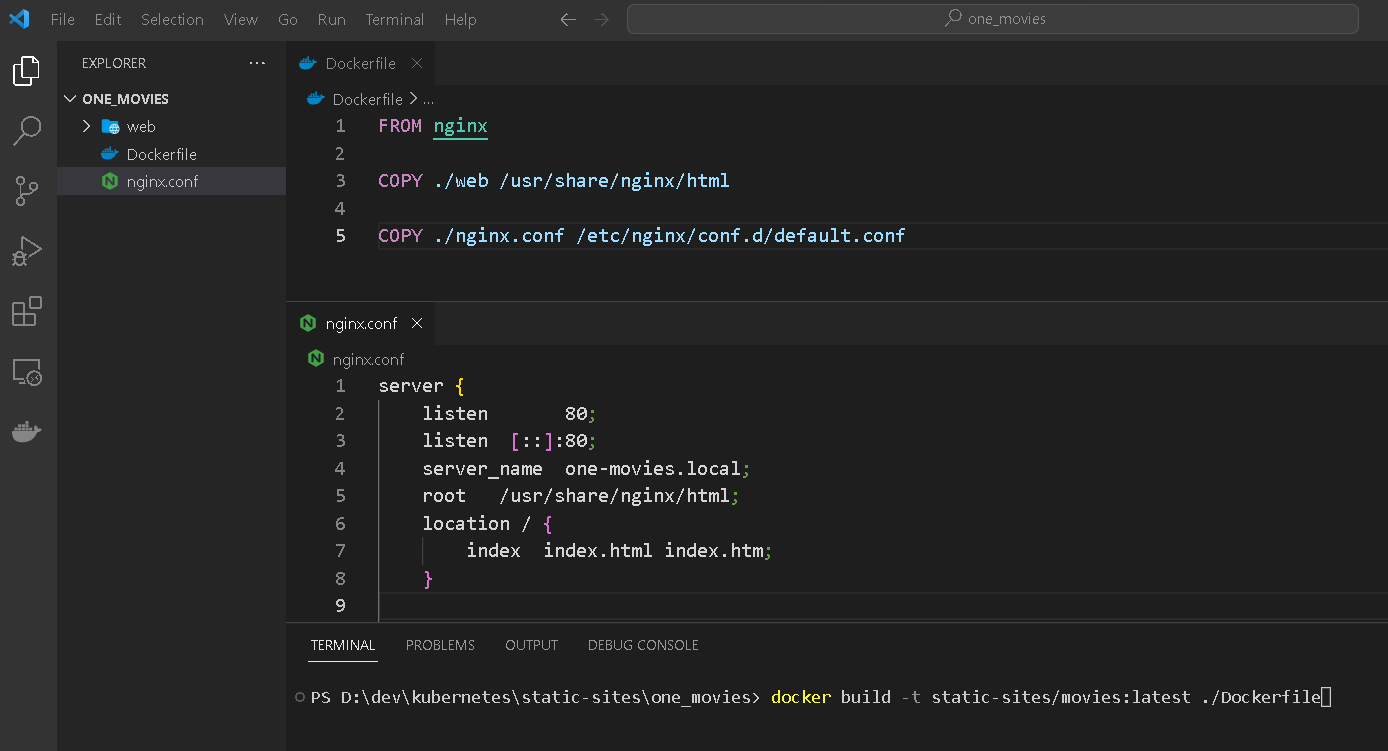
The above command will build the docker image from the Docker file given below. Don’t forget to check all paths mentioned in the Dockerfile. The host paths should exist as mentioned in the COPY commands in the file. The web directory contains all our static files for the website and nginx.conf is for the NGINX web server. Simply we have combined our static website files with the Nginx docker image and also our custom Nginx virtual host configuration.
FROM nginx
COPY ./web /usr/share/nginx/html
COPY ./nginx.conf /etc/nginx/conf.d/default.conf
Nginx virtual host configuration is required to access our static website using a proper domain name.
server {
    listen       80;
    server_name  one-movies.local;
    root   /usr/share/nginx/html;
    location / {
        index  index.html index.htm;
    }
}
Now our docker image is ready for deployment in the Kubernetes cluster. So let’s now import this image into the cluster.
Loading Docker Image on Kubernetes Cluster
As we learned above that we are not going to run just a simple HelloWorld-like example with Kubernetes. That is why we merged the static site content files along with the Nginx official image and created our custom image. So now instead of using the official Nginx image, we will use the customized static-site image that will give us more satisfaction while learning Kubernetes. This requires us to load our previously created packed docker image on the Kubernetes cluster. And we will do so by running the following shell command.
kind load docker-image static-sites/movies:latestThis local docker image will be imported into each of the Kubernetes clusters like below.
Image: "" with ID "sha256:cd090aafc1f288d50aa56f899fb0f541817a316d9f7c15f9635ee581f38151db" not yet present on node "kind-worker2", loading...
Image: "" with ID "sha256:cd090aafc1f288d50aa56f899fb0f541817a316d9f7c15f9635ee581f38151db" not yet present on node "kind-control-plane", loading...
Image: "" with ID "sha256:cd090aafc1f288d50aa56f899fb0f541817a316d9f7c15f9635ee581f38151db" not yet present on node "kind-worker", loading...
Create a Kubernetes deployment component
Kubernetes deployment components are the main components that hold the docker image and create containers on cluster nodes. Like in docker we don’t directly play with containers in the Kubernetes environment. We rather deal with deployment components.
Note how we are using the previously build docker image in the following deployment configuration file. We also mention that the docker image will never be tried to be pulled from online as it is available locally, as we loaded in the previous step.
apiVersion: apps/v1
kind: Deployment
metadata:
  name: movies-deployment
  labels:
    app: movies
spec:
  replicas: 1
  selector:
    matchLabels:
      app: movies
  template:
    metadata:
      labels:
        app: movies
    spec:
      containers:
        - name: movies
          image: static-sites/movies:latest
          imagePullPolicy: Never
          ports:
            - containerPort: 80
Try to create the deployment by applying the above configuration file.
kubectl apply -f .\kubernetes\deployment\movies-deployement.yamlThe deployment will be created and we should get the following intimation.
deployment.apps/movies-deployment createdCreate a Kubernetes service component
Instead of directly accessing the pod using port forwarding, we add one more abstraction layer. Also, this acts as a load balancer to connect to a more healthy/free pod in case we have multiple pods running the same app. And that is the beauty of Kubernetes (Container Orchestration Tool).
apiVersion: v1
kind: Service
metadata:
  labels:
    app: movies
  name: movies-service
spec:
  ports:
    - port: 80
      protocol: TCP
      targetPort: 80
  selector:
    app: movies
  type: ClusterIP
Try to create the service by applying the above configuration file.
kubectl apply -f .\kubernetes\service\movies-service.yamlThe service will be created and we should get the following intimation.
service/movies-service createdCreate a Kubernetes ingress component
The Ingress component is required to access the application using a domain name from the outside world of the cluster (browser). This is the one and only public interface for the outside world to access our application and hence our application is safe. The Ingress component talks to our service component on the specified port.
apiVersion: networking.k8s.io/v1
kind: Ingress
metadata:
  annotations:
    kubernetes.io/ingress.class: "nginx"
  name: my-ingress
spec:
  rules:
    - host: one-movies.local
      http:
        paths:
          - pathType: Prefix
            path: /
            backend:
              service:
                name: movies-service
                port:
                  number: 80
To create the ingress rules apply the above configuration file.
kubectl apply -f .\kubernetes\ingress\nginx\movies-ingress.yamlAnd we should get something like the one below.
ingress.networking.k8s.io/my-ingress createdAll done now, we are ready to test the site. Before that just do a DNS bypass by adding one entry in your hosts file for the specified domain you have given in nginx.config.
127.0.0.1 one-movies.local
Teardown everything
 kubectl delete -f .\kubernetes\ingress\nginx\movies-ingress.yaml
 kubectl delete -f .\kubernetes\service\movies-service.yaml
 kubectl delete -f .\kubernetes\deployment\movies-deployement.yaml
 kind delete cluster
After testing all these don’t forget to clear everything we just created and stop docker.